For epoxy projects involving wood, proper preparation is a key part of success. In order to achieve a long-lasting epoxy finish without flaws, the wood must be made ready for the epoxy coating through several preliminary steps. This process helps ensure that the epoxy adheres well, cures correctly, and highlights the natural beauty of the wood without imperfections.
In this article, we'll give a step-by-step guide to preparing wood for an UltraClear epoxy finish.
A step-by-step guide to preparing wood for an epoxy finish

Step #1: Select the right wood (if needed)
If you haven't done so already, you'll first need to acquire wood for the project. Though many epoxy projects simply involve coating a pre-existing piece of furniture, such as a wooden table top, but for custom projects like an epoxy bar top, you'll need to choose the wood before you can begin.
Tips for choosing the right wood for your project:
- Choose dense, stable wood: Opt for hardwoods like maple, oak, walnut, or cherry, which are less likely to warp or crack compared to softwoods.
- Avoid moisture-prone wood: Steer clear of wood that is prone to absorbing moisture, such as pine or cedar, unless it is properly sealed.
While almost any wood can serve as an adequate substrate for epoxy resin, choosing based on these guidelines can help you get the most out of your project and provide an easier preparation phase.

Step #2: Gather tools and supplies for the epoxy application
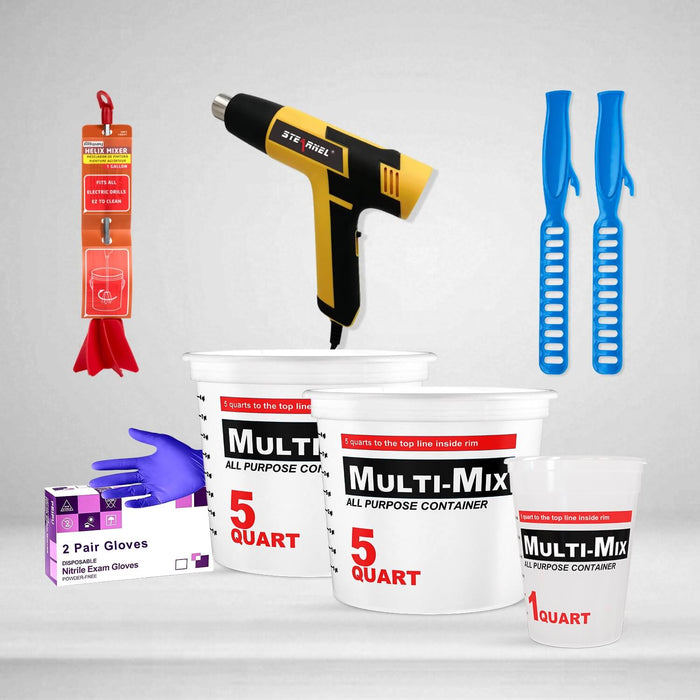
After finding the right wood for your project, it's time to gather up any remaining supplies you'll need for epoxy application.
These include:
- Safety gear: Wear gloves, safety goggles, and a respirator mask to protect yourself from fumes and skin contact when working
- Mixing tools: Use clean mixing containers, stirring sticks, and measuring cups to ensure accurate resin and hardener ratios.
- Application tools: Have brushes, rollers, or pour tools ready for applying the epoxy evenly across the surface.

Step #3: Clean the wood surface thoroughly
Once you've gathered your project supplies, you'll be ready to begin the preparation process.
Here's what to do:
- Remove dirt and debris: You can use a vacuum or a soft brush to eliminate dust, dirt, and debris from the wood surface.
- Degrease the wood: Wipe down the wood with a solvent like denatured alcohol or mineral spirits to remove oils, grease, and other contaminants that can interfere with epoxy adhesion.
- Dry completely: Ensure the wood is completely dry before proceeding. Moisture trapped in the wood can cause the epoxy to bubble or fail to cure properly.
Step #4: Remove any existing finishes
If your wood already has a finish on it, you can remove it to provide a better bonding surface.
Here's how:
- Strip the old finish: Existing finishes such as paint, varnish, or stain can be removed using a chemical stripper or by sanding them off. This provides a clean surface for the epoxy to bond effectively.
- Sanding: Use coarse-grit sandpaper (80-120 grit) to strip away old finishes, followed by finer grits (220-320 grit) to smooth the surface.

Step #5: Sand the wood surface
Many users elect to sand their wood surface for a substrate that is flat and smoother. This is done by using medium-grit sandpaper and gradually progressing to finer grits.
- Start with coarse sanding: Begin sanding with medium-grit sandpaper (120-150 grit) to smooth out any rough areas and remove any remaining imperfections.
- Then move to fine sanding: Move to finer grits (220-320 grit) to create a smooth, even surface that enhances epoxy adhesion.
- Ensure uniform smoothness: Sand in the direction of the wood grain to avoid scratches that can mar the final result.
Step #6: Fill any gaps and imperfections (if needed)
You can fill in any empty spaces in the wood using fillers prior to your epoxy coating. Some users instead just use the epoxy to fill in those spaces.
- Use a wood filler: Apply a high-quality wood filler to any cracks, knots, or holes in the wood. Allow it to dry completely according to the manufacturer's instructions.
- Sand any filled areas: Once the filler is dry, sand the filled areas smooth with fine-grit sandpaper to ensure a seamless surface.

Step #7: Perform a final cleaning
It's almost time to start the epoxy project. But first, it's important to do a final cleaning.
- Remove all dust: After sanding, thoroughly clean the wood surface to remove all dust particles. Use a vacuum, tack cloth, or a lint-free cloth dampened with alcohol to ensure the surface is pristine.
- Inspect the surface: Check for any remaining imperfections or contaminants and address them as needed before applying epoxy.

Step #8: Protect surrounding areas of your project
It's easier to account for mistakes than to fix them later. We recommend preparing your protecting your project work space from potential epoxy drips or spills.
- Place drop cloths for cover: Cover surrounding surfaces with drop cloths or plastic sheeting to protect them from spills and splatters.
- Use masking tape: Apply masking tape to edges and areas where you do not want epoxy to spread, ensuring clean lines and borders.
Step #9: Set the right climate conditions for the epoxy
Finally, for a perfect cure, you'll need to set the climate conditions of the project area to the right temperature and humidity.
We have some general recommendations, but you should check your epoxy instructions for specific info:
- Control the temperature and humidity: Epoxy cures best in environments with stable temperatures (ideally 75°F, but at least between 70°F and 80°F) and low humidity (no more than 60%). Avoid applying epoxy in direct sunlight or areas with high moisture.
- Provide adequate ventilation: Work in a well-ventilated space to allow fumes to dissipate and to facilitate proper curing of the epoxy.
Avoid common curing mistakes by reading these 5 tips!
Step #10: Seal the wood (if necessary)
When it's time to apply the epoxy, it's likely best to first give your wooden substrate a seal coating.
- Apply a seal coat: For porous woods (i.e., most woods!), applying a seal coat of epoxy or a clear polyurethane can help prevent air bubbles and ensure even curing. This step is especially important for live-edge or irregular surfaces.
- Allow it to cure: Allow the seal coat to cure before applying the main epoxy layer.
Not familiar with epoxy coating methods? Learn about them here!
More tips for successful wood preparation
- Consistency is key: For each step, be thorough and consistent as you work your way across the entire surface to avoid uneven epoxy application later.
- Take your time: Unlike with epoxy, there's no need to be swift while cleaning the wood. Rushing the preparation process can lead to mistakes and imperfections in the final epoxy finish.
- Test a small area: If unsure about any preparation step, consider testing it on a small, inconspicuous area first to ensure compatibility and effectiveness.
Have questions? Want advice? Contact us!
If you have any questions about preparing wood for epoxy resin, or if you'd like assistance in planning an epoxy project, please reach out to us at UltraClear Epoxy—our epoxy experts are ready to assist!
You can contact us via phone or email here. During business hours, you can also text chat online with one of our resin specialists by clicking the Help button at the bottom of your screen.
In our online store, you'll find a variety of useful tools and supplies, ideal for resin projects, plus our award-winning UltraClear Bar & Table Top Epoxy and our UltraClear Deep Pour Epoxy.


