When it comes to epoxy projects, few represent the dynamic potential of epoxy as well as an epoxy serving tray. In fact, epoxy serving trays are a terrific example of the combination of beauty and utility that epoxy melds together. Moreover, this type of project is a great way for beginners to test the waters before diving into a more substantial project such as a river table or bar top.
In this article, we'll explain how to craft your very own epoxy serving tray, complete with a river vein that can be left transparent or decorated per your creative preferences.
What is an epoxy serving tray?
Naturally, before you attempt to make something it's good to understand what it is.
An epoxy serving tray is a small hand-held tray, typically constructed from one or more pieces of wood and a surrounding layer of epoxy. In some cases the epoxy only partially covers the wooden surface, and in others it completely encapsulates. Most serving also have handles on opposite sides, for easier moving.
The potential for customization is high with this type of project, and many epoxy users elect to craft their trays with an epoxy river, which is a shaped vein of epoxy that "flows" between pieces of the substrate material. Such elements bring an elegance to the tray whose appearance can be altered with colorful pigments and dyes.
Get reliable results by choosing the right epoxy.
The most important thing you can do in planning your epoxy project is making sure to get a reliable, high-quality epoxy resin. These days, there are numerous low-cost brands of epoxy that cut corners on product quality and safety. Providers of these "budget brands" are able to skirt regulatory standards by manufacturing their epoxy outside the U.S. and importing it..
The best way to avoid the issues these is to invest in high-quality epoxy from a credible brand with a focus on quality assurance and product safety. And at UltraClear, that's what we provide.

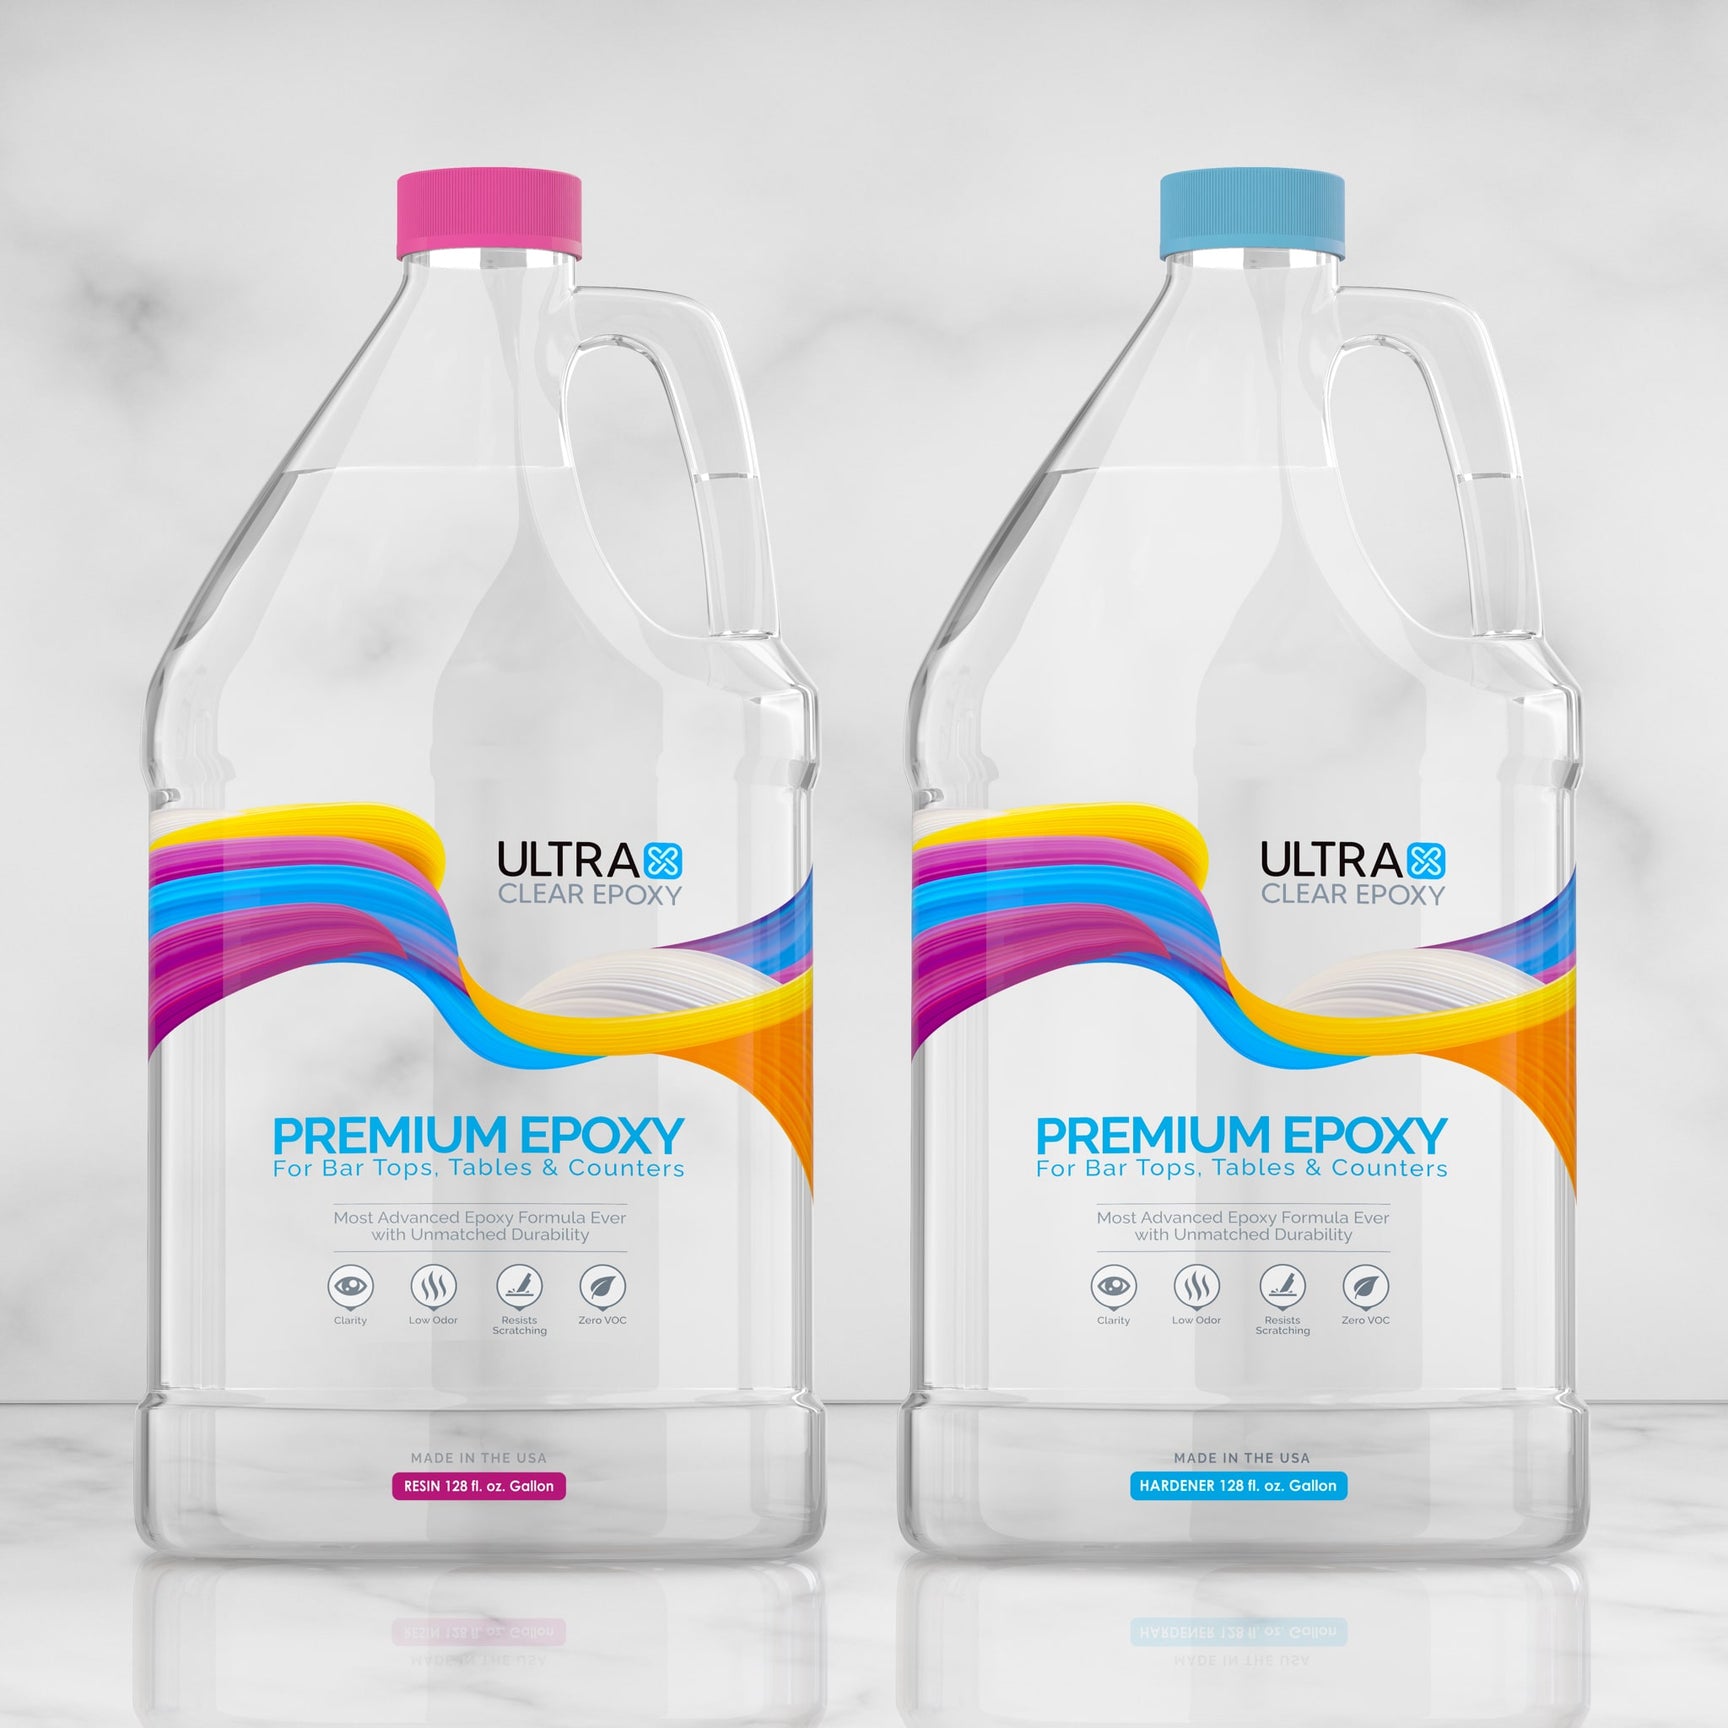
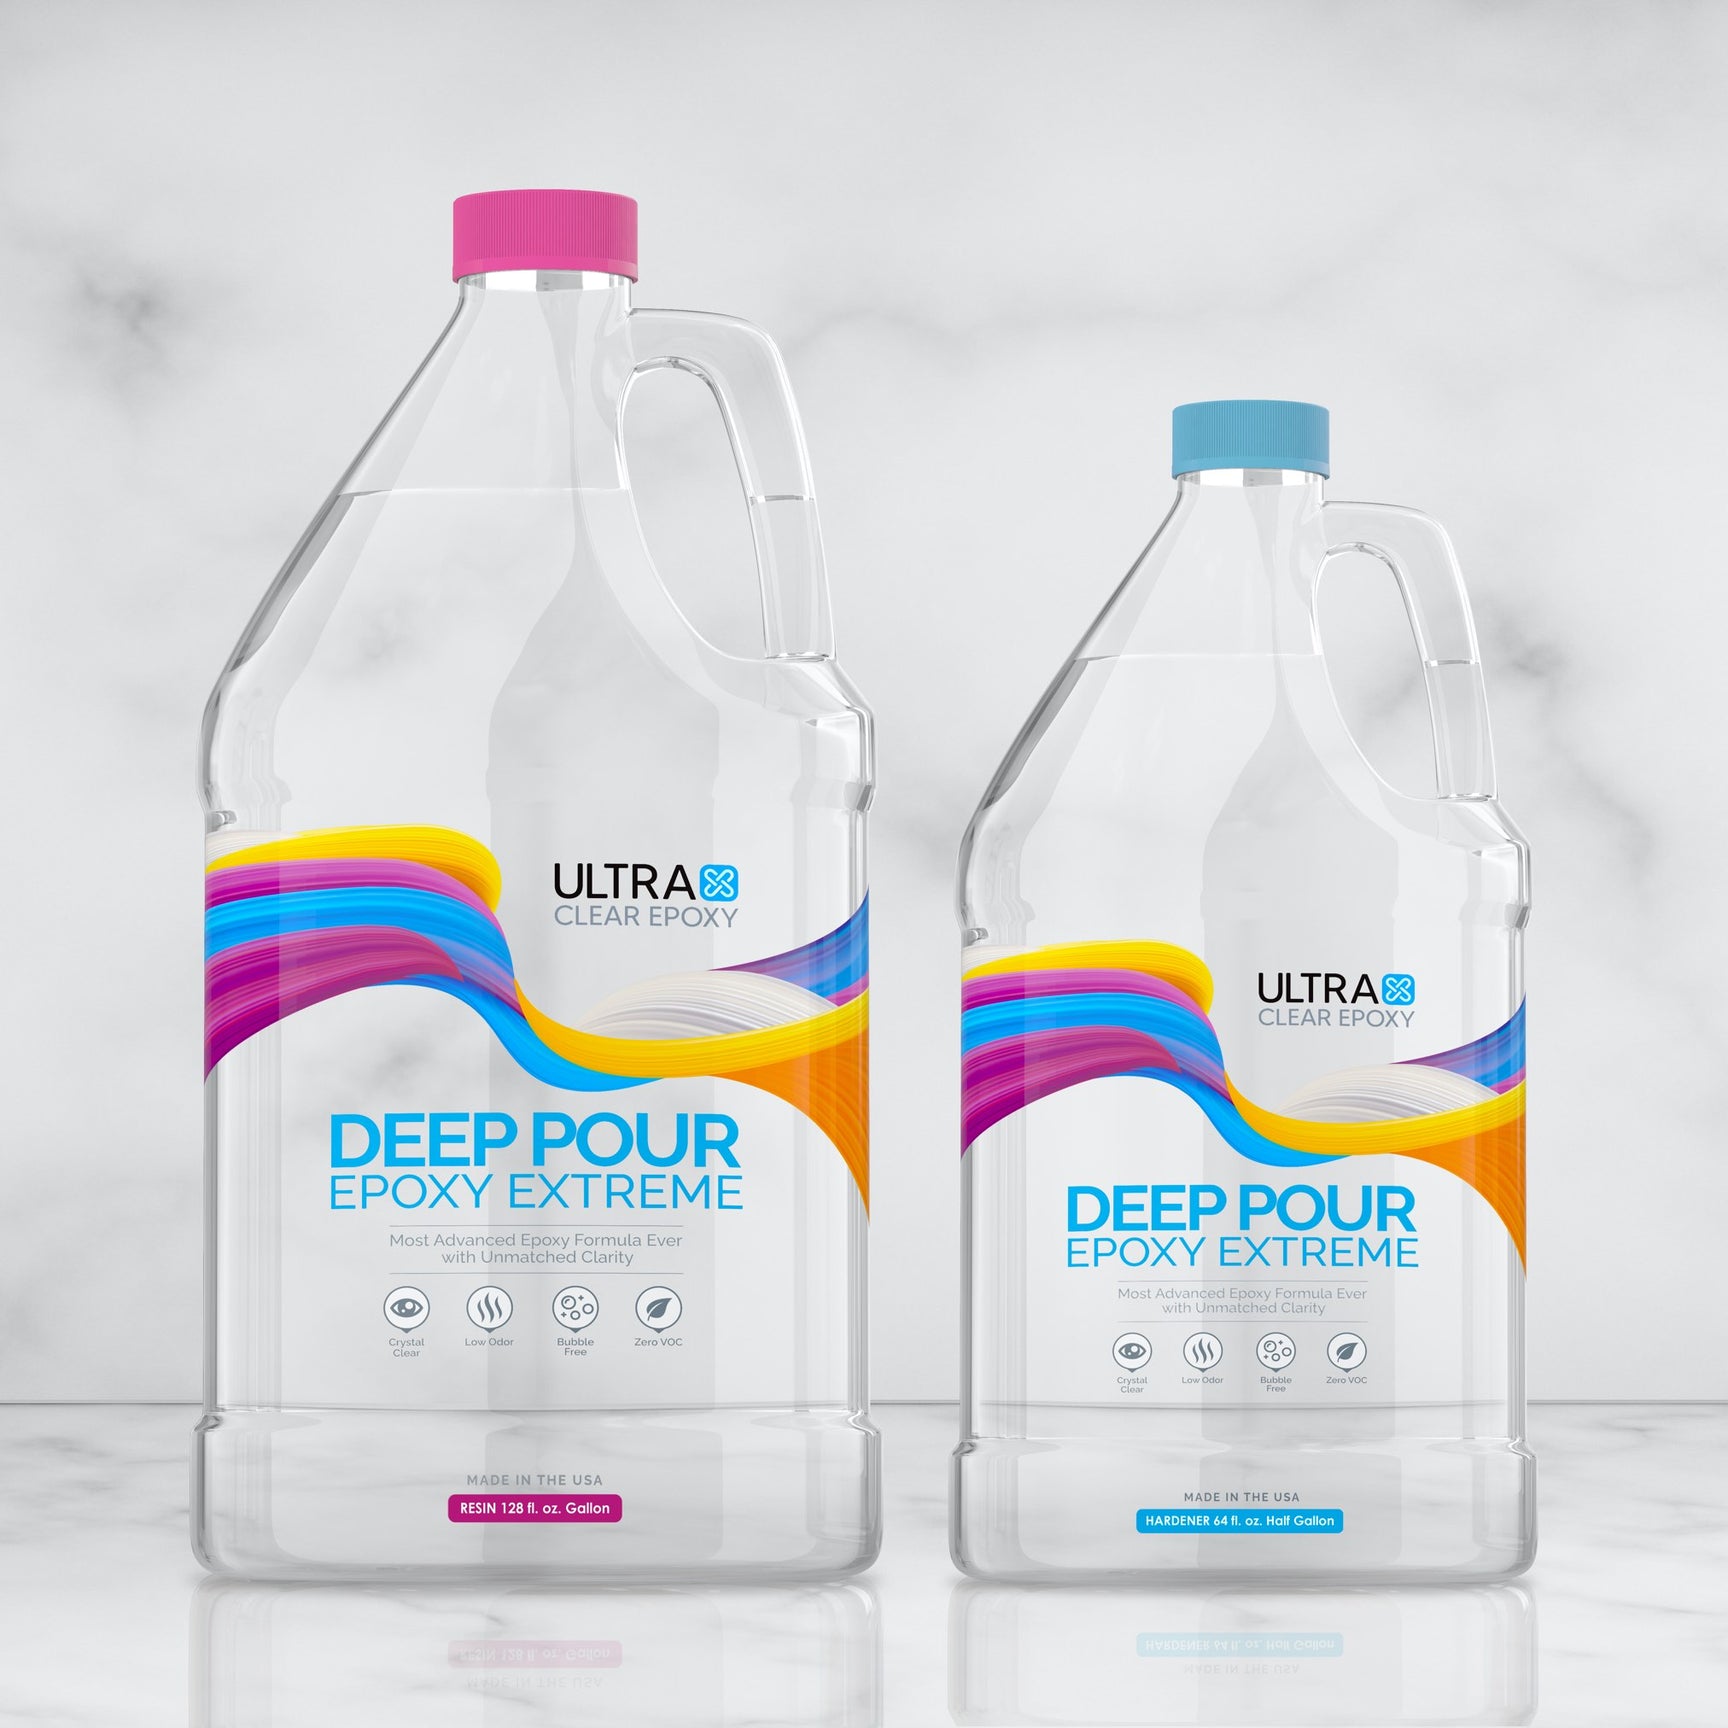
UltraClear Epoxy: Premium epoxy for an optimal outcome
At UltraClear Epoxy, our resin lineup is premium quality, designed to provide the best in clarity and strength, while remaining safe for use. All fully produced in the USA.
For a serving tray, we recommend one of the three following epoxies:
- UltraClear Bar & Table Top Epoxy—Our strongest resin. It supports 1/8-inch layers and cures crystal-clear.
- UltraClear Deep Pour Epoxy—Our deep casting resin. Use this if you need an extra thick layer of epoxy for your serving tray. It supports up to 2-inch layers.
- UltraClear Art & Craft Epoxy—Our craft resin, designed for smaller projects focused on artistic expression. It can be easier to manipulate than Bar Top Epoxy.
By opting for epoxy from a trustworthy, USA-based provider that abides by safety regulations and emphasizes quality assurance, you'll get not only the quality of a premium brand that won't give in to standard wear and tear, but also the peace of mind that comes with the certainty that your chosen epoxy has been properly vetted for safe use in domestic and commercial establishments.

A step-by-step guide to making epoxy serving trays with a river vein
Creating an epoxy serving tray with a river vein is a fantastic project that combines functionality with artistic beauty. Our detailed guide to making one is below, but you'll first need to gather the following materials:
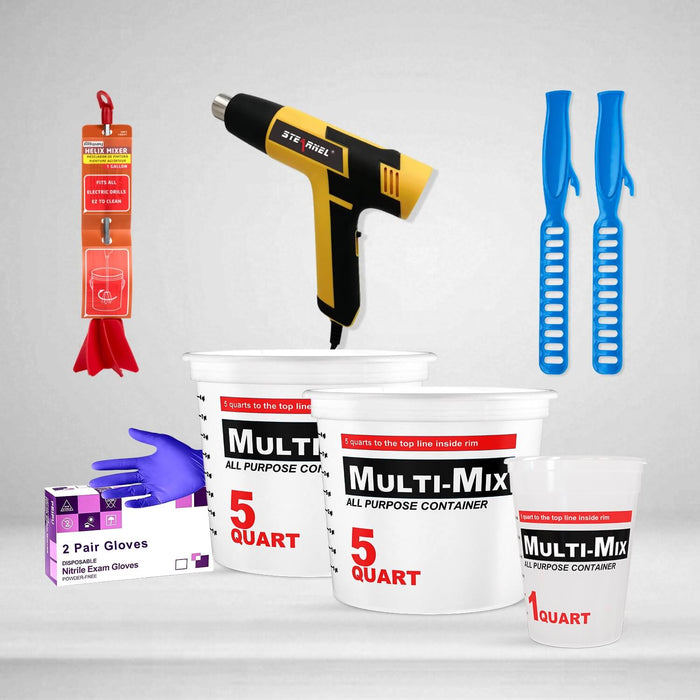
Materials Needed:
- Wooden tray base or wooden planks to construct the base
- Two-part epoxy (ideally a type suitable for deep pours if you plan a thick river)
- Pigments or dyes (optional—for coloring the epoxy)
- Silicone or sheathing tape (for sealing the mold)
- Mixing containers (5-quart and 1-quart containers are available in our store)
- Mixing sticks
- Gloves (nitrile works best)
- Heat gun or torch (for removing air bubbles)
- Sandpaper (various grits)
Step-by-step guide:
Below is our step-by-step guide. Though we use wood as the substrate material (tray base), there are many other viable options for this if you'll be fully coating the substrate in the end.
Step #1: Prepare the tray base.
Begin by constructing or purchasing your substrate.
Start with a wooden tray or make a tray base by joining wooden planks. If you’re constructing the base, ensure you have a recessed area where the river will go.
Pretty much any wood is viable if you'll be fully coating it.
Sand and clean the wood to prepare it for the epoxy bond.
The wood should be sanded thoroughly to remove any rough spots. Once done, clean it to ensure there’s no dust or debris.
Discover more about prepping a substrate here.

Step #2: Seal in the substrate.
Next up is a seal coating of epoxy. To do this, use a apply a thin layer of epoxy to seal the wood. This prevents air bubbles during the main pour and helps the epoxy adhere better. Allow it to cure as directed.
Learn about epoxy seal coats in our dedicated guide to them.
Step #3: Set up the mold.
For this (sometimes optional) step, you'll prepare a barrier to contain the epoxy around your project until it finishes curing.
If your tray isn’t already bounded by edges, use a non-stick material like silicone or sheathing tape to create a barrier around the edges to prevent epoxy from leaking. Some projects may not need this barrier if the tray itself serves as one naturally.
Step #4: Mix and color the epoxy.
Mix up a batch of epoxy for the river vein; the volume needed is determined by the size of the space.
Following the manufacturer's instructions, mix the epoxy resin and hardener carefully. The exact ratio should be followed precisely to ensure proper curing.
(Optional) Add color to your resin batch prior to pouring.
Simply mix in your chosen pigments or dyes to the epoxy. For a river effect, translucent blues or greens are popular, but you can choose any color that fits your design.
Read up on how to color your epoxy here.

Step #5: Pour the Epoxy
Pour the epoxy batch into the river vein area.
Slowly pour the colored epoxy into the designated river area of the tray. If the layer is thick, consider pouring in stages to avoid excessive heat buildup.
Remove any air bubbles that form.
After pouring, you'll use a heat gun or torch to carefully remove any air bubbles that appear on the surface.
Simply hold the tool several inches away from the epoxy and move smoothly across the resin surface without lingering for more than a second (to avoid heat damage). Do one full pass then check for more bubbles and repeat as needed.
We've written a guide on handling air bubbles. Take a look here!
Step #6: Let the epoxy cure.
Allow the river vein to cure.
At this point, the epoxy needs to cure—per the resin’s guidelines. Ensure the environment is stable in terms of temperature and humidity.
Check out these 5 tips on curing!
Step #7: Apply finishing touches and the final coating.
Once it has cured, it'll be time to sand and finish the river vein.
If any epoxy has overflowed or the surface isn’t perfectly smooth, you can sand it down, starting with a coarse grit and moving to a finer grit for a smooth finish.
Finally, apply a topcoating of epoxy.
After sanding, a final layer of epoxy can be applied to the entire tray. For this, we recommend our UltraClear Bar & Table Top Epoxy, which provides the strongest protection.
This coating will fully cover the wood substrate as well as the river vein.another layer of clear epoxy as a top coat to enhance durability and give a glossy finish.
Allow the coating to fully cure.
Step #8: Finalize the assembly of your tray.
Attach any hardware intended for the tray.
If your tray needs handles, attach them after the epoxy has fully cured. Most users place two handles on opposing ends to the tray for convenience.
In following these steps, you’ll be able to create a remarkable epoxy river tray that’s not only a functional item but can also serve as a talking point at social gatherings.

UltraClear Epoxy: Resin Products of Unmatched Quality
As with any material, epoxy resin has both pros and cons. But no other sealant has so few weaknesses, and that's what puts epoxy above all other options when it comes to being a finish for high-traffic fixtures and furniture such as countertops, table tops, and bar tops. And among epoxy resin products, there are none that match the quality of UltraClear.
You can find our UltraClear Epoxy products on the following pages:
- UltraClear Bar & Table Top Epoxy: The classic choice for bar tops, countertops, and table tops. Rock-solid, waterproof, and crystal-clear.
- UltraClear Deep Pour Epoxy: Our deep pour casting resin. Ideal for thick layers, such as those needed for river tables.
- UltraClear Art & Craft Epoxy: Our arts and crafts resin, designed for smaller artistic endeavors which typically involve resin molds and require a bit more fluidity than bar top epoxy.
With high chemical and physical resistance, UltraClear resins can withstand and endure many forms of wear and tear without breaking a sweat or showcasing any cosmetic damage.
Plus, in addition to its ease of application, they also require little upkeep to maintain its pristine appearance. With a high-quality epoxy finish, you can expect a minimum lifespan of 7 years, with no need for reapplication. Beyond that, it's a breeze to renew that coating, requiring only a light sanding and a fresh layer of epoxy.