Learn why your epoxy resin has air bubbles and how to treat and prevent them from happening to all your future resin projects.
What are they?
Air bubbles are some of epoxy users worst nightmares when it comes to pouring epoxy projects. Everyone wants to pour a liquid glass like surface that is seamless, crystal clear, and durable. There are several issues that can arise when trying to pour a perfect epoxy resin surface, and air bubbles are one of them.
Where are they coming from?
When epoxy is manufactured, bottled, shipped, and delivered to your home you’ll notice that there are zero air bubbles in the epoxy when it’s opened. If there are no air bubbles in the product naturally, where do they come from when you pour them on the surface? The short answer is they come from the user who is mixing and pouring the epoxy every time. This is true for expert epoxy professionals and first time epoxy users as well. The only difference is the expert users have perfected their technique as far as prepping, mixing, and pouring to prevent air bubbles at all costs.
Different types of epoxy air bubbles and how to prevent them:
-
Air bubbles introduced into the epoxy during the mixing process.
This can be due to the epoxy user mixing too vigorously or for too long. You don’t want to whip the hardener and resin together quickly and pull a lot of air into the mixture. To prevent air bubbles that occur during your epoxy mixing process: It’s best to mix at a slower, constant speed for the correct amount of time necessary to ensure you are fully and completely mixing the two products together so they can activate properly.
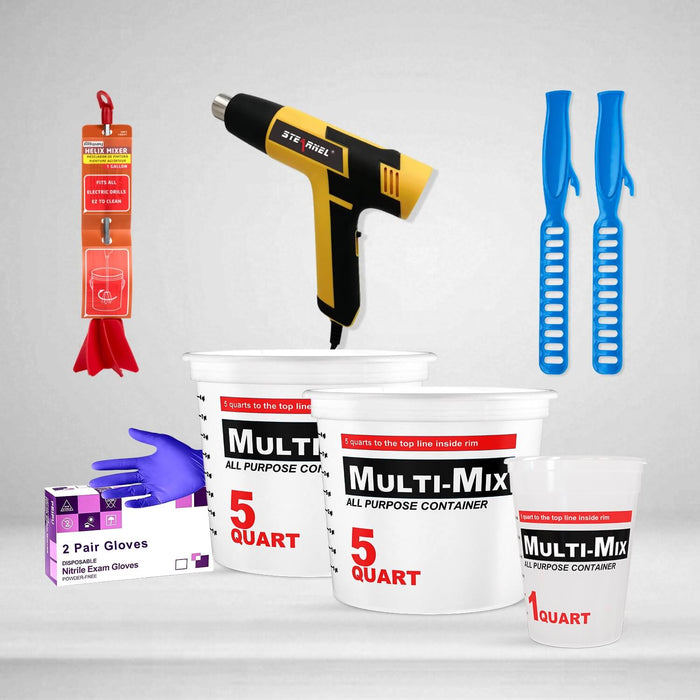
Another cause of this is the mixing tool you are using. As with anything else, you want the right tool for the right job. For smaller batches less than a gallon total, we recommend only mixing by hand with a stir stick. The stir sticks we provide on our site excel at this process due to the holes they have slotted out in them to allow air to pass through and release from the mixture. Another mixing tool is the mixing paddle attachment that is used with a cordless drill. While this is a great time/energy saver when doing multiple batches, it’s best to only use this mixing paddle when you are mixing a full gallon of resin at a time. Anything less than a gallon wouldn’t be enough material to stop the paddle from pulling in tons of air and leaving you with a mixture full of bubbles or micro-bubbles.
No matter how perfectly you are mixing your resin, it’s still common and should be expected to have a few air bubbles in your resin mixture as you pour it out onto your surface. However these can be easily dealt with. You can purchase a heat gun or use a plumbers torch and simply wave these over your surface immediately after pouring to pop any air bubbles that have appeared. You only want to do this within the first 15 minutes after you’ve poured your epoxy. As using the heat gun or plumbers torch past this time could cause ripples or other potential damage to your curing resin.
-
Air bubbles releasing from the wood/surface you are pouring over.
Surfaces such as wood, concrete, caulk between tiles, etc. are all porous surfaces that have trapped air inside of them. This is especially true when dealing with older wood such as reclaimed barn wood that is full of cracks, knots, holes, etc. If your wood surface is similar to this, it will likely require multiple seal coats over your surface before attempting to pour your epoxy flood coat. For regular wood, one seal coat is normally all that is necessary to keep the air trapped inside the wood from releasing into your flood coat.
Overall, air bubbles are a normal part of the epoxy pouring process. They shouldn’t be feared as some terrible project ruiner, rather they should just be expected and managed with proper preparation and bubble management techniques. The most important part of pouring epoxy is making sure your surface is sealed, because if it isn’t it will continue to release air into your flood coat during the entire curing process. This type of situation would cause you to have bubbles trapped inside your flood coat and the only way to remove these would be to sand and re-coat your surface. So by simply ensuring you have done the proper amounts of seal coats, you can avoid this situation from happening in the first place.